Termination Instructions
*Note: The instructions marked
with the * are only necessary to produce the weatherproof IP67 connections.
If your application is indoors, the
silicone sealing steps are not necessary. |
|
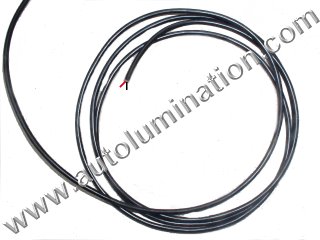
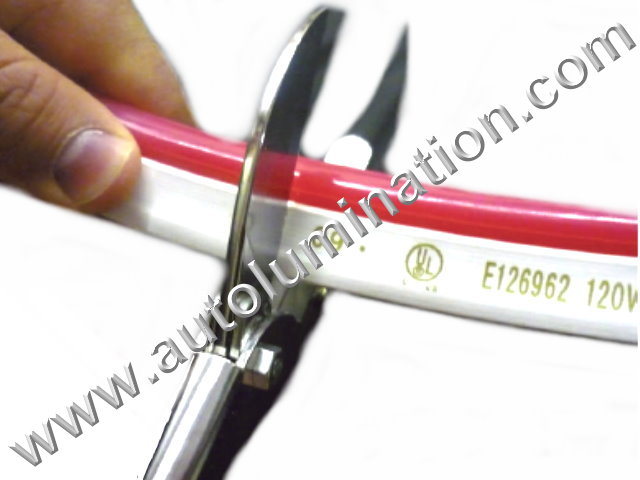
1. Cutting the Tubing |
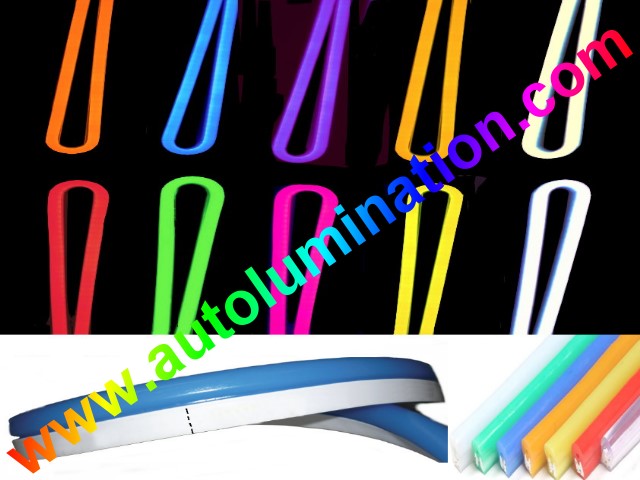
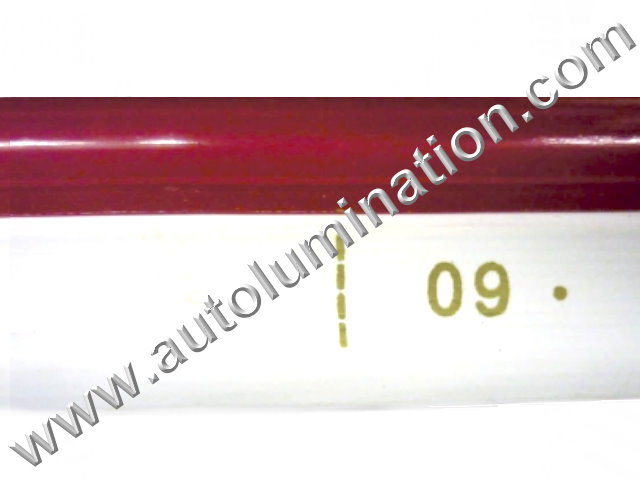
The Neon Tube has marks or stripes every 112mm (4-3/8"). This
marks the beginning and end of a new circuit. The Neon Tube must be cut on these marks only. If the Neon Tube is cut in between the marks, this will interrupt the flow of current to the leds causing some or all of the
Neon Tube to not light.
|
 |
|
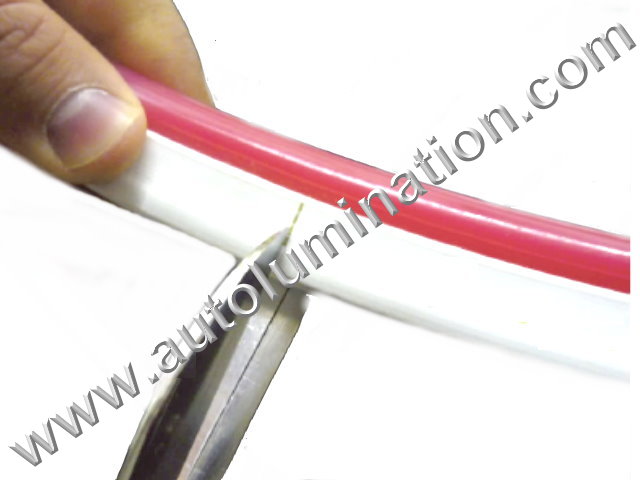
Measure and then locate the nearest stripe to wear you desire to make the cut.
|
 |
|
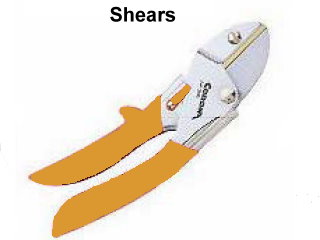
Using heavy shears, make a straight cut on the line.
|
 |
|
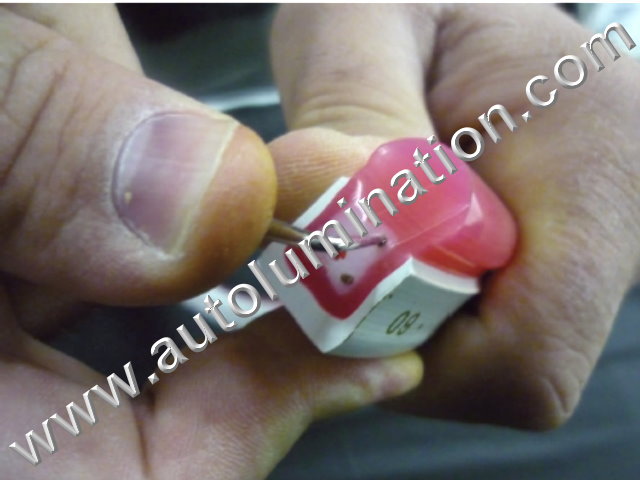
2. Installing H-Pin Connectors |
|
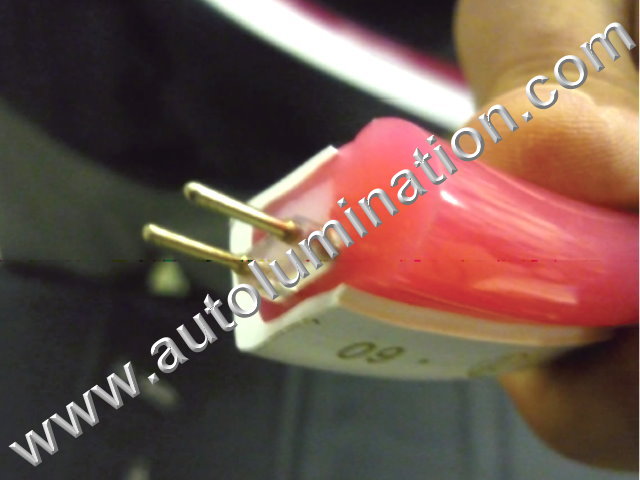
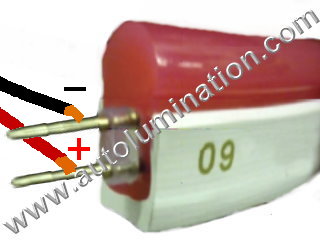
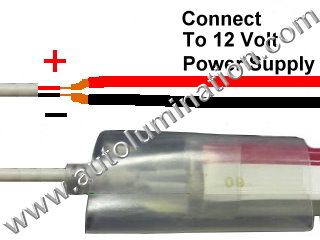
There are 2 conductors (wires) that run thru the
length of the neon tubing. These conductors are 12V (+) and (-). Looking at the end of the Neon Tube, these will
appear as two small dark spots. The (+) conductor will be toward the rounded part of the Neon Tube (top). The (-)
conductor will be toward the flat part of the Neon Tube (bottom). |
 |
|
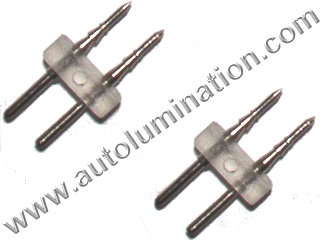
The H-Pin Connectors consist of two pins (+) and (-). One end of each pin will have
barbs on it. The barbed end of the H-Pin is the one that should press into the Neon Tube. The other end of
each pin will be smooth. The smooth side of the pins will plug into the Power Cord.
|
 |
|
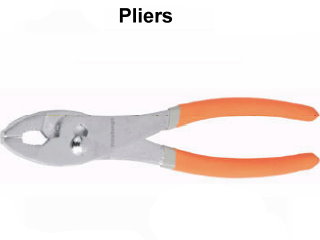
Carefully align the H-Pin Connector with the two conductors of the neon tube and begin to
press the H-Pin Connector into the end of the Neon Tube. Continue to press the
H-Pin Connector into the Neon Tube using pliers until the small plastic collar is firmly in contact with the Neon Tube.
|
 |
|
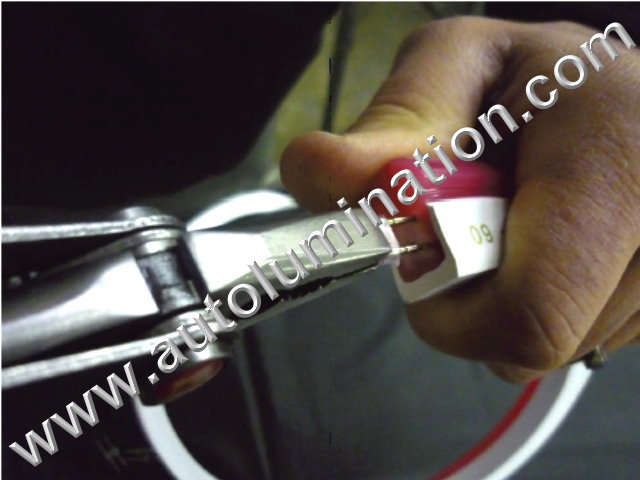
When fully seated, the H-Pin should be halfway into the neo
tubing leaving the other half of the pins exposed. These will be inserted into the mating side later.
|
 |
|
**Important Step - Test the connection using two test leads (12V+ and 12V-) connected to any 12 Volt power sources If tube
does not light, either the +/- wires are reversed or the H-Pin is not contacting one or both conductors in the tube.
Remove H-Pin, inspect, adjust, reinsert and retest. |
 |
|
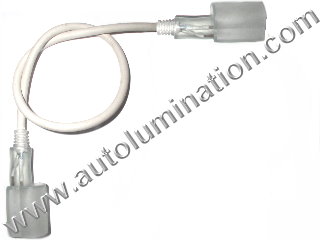
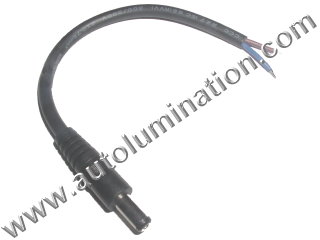
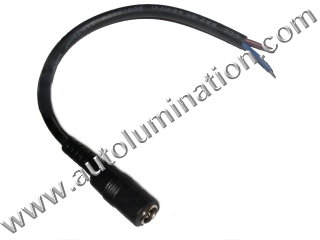
3. Installing the Power Cord |
|
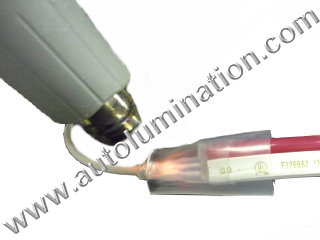
Use the heat gun to warm up the plastic cap on the Power Cord.
This will make the cap softer and pliable. |
 |
|
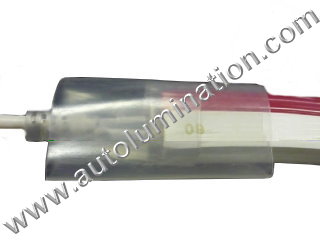
Align the contacts (pins) of the H-Pin with the
contact (sockets) of the Power Cord. Push the Power Cord firmly into place. Note: If after repeated
attempts, you are not able to align the pins and sockets, you can cut the jacket of the power cord a little shorter.
This will make it easier to align. |
 |
|
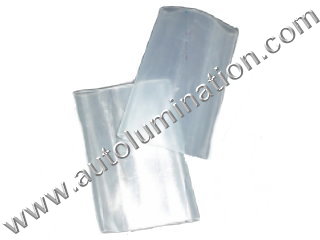
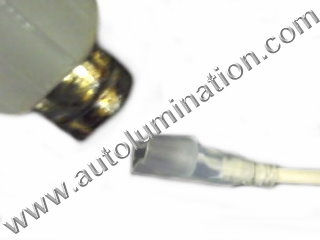
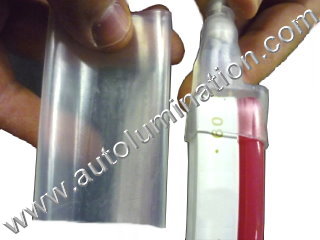
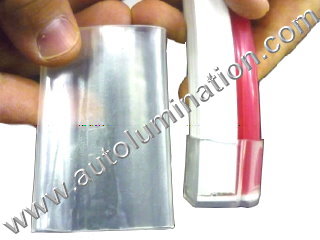
Locate a piece of Shrink Tube. |
 |
|
Insert the shrink tubing over the Power Cord, aligning
the center of the Shrink Tube over the end of the neon tubing.
|
 |
|
**Important Step - Test the connection using two test leads (12V+ and 12V-) connected to any 12 Volt power sources If Neon
Tube
does not light, either the +/- wires are reversed or the H-Pin or Power Cord Terminal(s) are not contacting one or both conductors in the
Neon Tube.
Remove Power Cord and retest H-Pin. Inspect, adjust, re-assemble and retest Power Cord connection.
|
 |
|
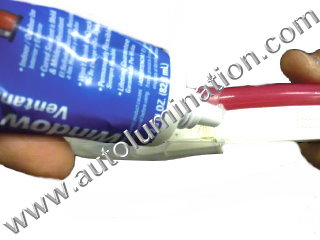
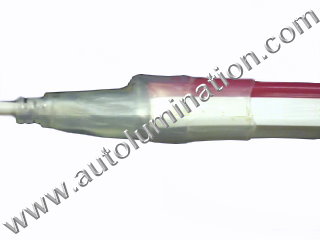
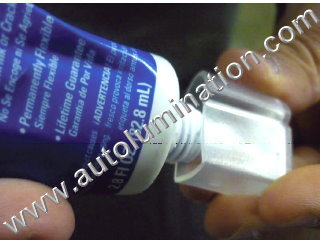
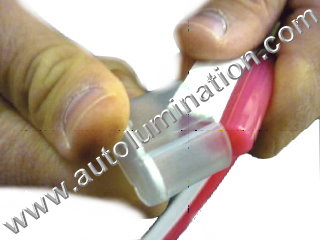
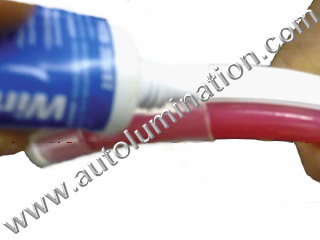
4. Sealing the Power Cord |
|
Slide the Shrink Tube back off of the Neon Tubing
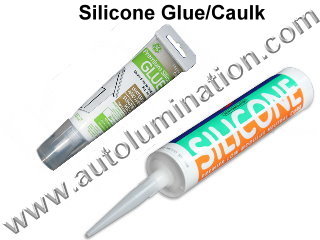
slightly. *Apply a bead of non-conductive silicone around the entire perimeter of the Neon Tubing. *Slide
the Shrink Tube back over the new bead of silicone on the Neon Tubing and then apply another bead of silicone around the
Power Cord wire (on the other end of the Shrink Tube). Slide the Shrink Tube back into position centered on the end of
the Neon Tubing. The two beads of silicone should now be under the Shrink Tube near each end.
|
 |
|
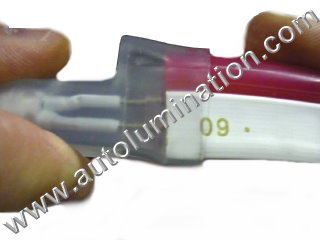
Using the heat gun, heat the Shrink Tube to seal
tightly. |
 |
|
*Apply another bead of silicone around the lip at each
end of the Shrink Tube to assure a watertight seal at each end. |
 |
|
Power Cord is now permanently sealed into place. |
 |
|
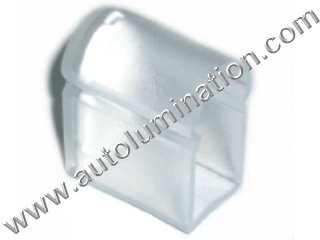
5. Installing the End Cap |
|
*Apply a small amount of silicone into the End Cap.
|
 |
|
Place the End Cap over the non-terminated end of the Neon
Tube. Press firmly into place.
|
 |
|
Locate a piece of Shrink Tubing.
|
 |
|
Place the shrink tubing over the end of the end cap.
Leave approximately 3/8" of the Shrink Tubing overhanging the end of the End Cap.
|
 |
|
6. Sealing the End Cap |
|
Heat Shrink Tube with heat gun to shrink and seal into
place.
|
 |
|
*Apply a bead of silicone to the end of the End Cap to
seal the end completely.
|
 |
|
*Apply a bead of silicone around the parameter of the
other end of the Shrink Tube to permanently seal the End Cap to the Neon Tube.
|
 |
|
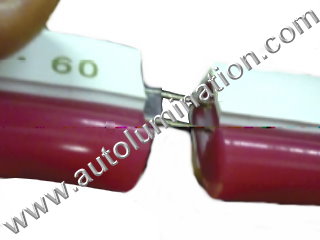
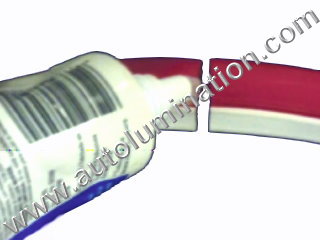
7. Creating a Splice |
|
There are 2 conductors (wires) that run thru the
length of the neon tubing. These conductors are 12V (+) and (-). Looking at the end of the Neon Tube, these will
appear as two small dark spots. The (+) conductor will be toward the rounded part of the Neon Tube (top). The (-)
conductor will be toward the flat part of the Neon Tube (bottom). |
|
|
Locate the H-Pin Connector.
|
|
|
Carefully align the H-Pin Connector with the two conductors of the neon tube and begin to
press the H-Pin Connector into the end of the neon tubing. Continue to press the
H-Pin Connector into the neon tube using pliers until the small plastic collar is firmly in contact with the Neon Tube.
|
|
|
When fully seated, the H-Pin should be halfway into the neo
tubing leaving the other half of the pins exposed. These will be inserted into the mating side later.
|
|
|
**Important Step - Test the connection using two test leads (12V+ and 12V-) connected to any 12 Volt power sources If tube
does not light, either the +/- wires are reversed or the H-Pin is not contacting one or both conductors in the tube.
Remove H-Pin, inspect, adjust, reinsert and retest.
|
|
|
Carefully align the H-Pin Connector with the two conductors of the other Neon Tube and begin to
press the H-Pin Connector into the end of the Neon Tube.
|
 |
|
Continue
to press the
H-Pin Connector into the neon tube until the small plastic collar is firmly in contact with both of the Neon Tubes. |
 |
|
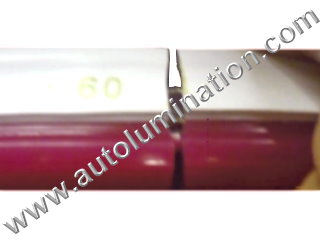
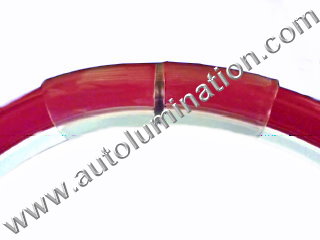
7. Sealing the Splice |
|
*Using the
non-conductive silicone, apply a bead of silicone all around the gap between the Neon Tubes.
|
 |
|
Install a
piece of Shrink Tube over the gap so that it is evenly spaced between the two Neon Tubes. |
 |
|
Use the heat
gun to shrink the Shrink Tube tightly to the Neon Tubes. *Apply a bead of silicone around each end of the shrink
tube to provide an additional moisture seal.
|
 |
|
Finished splice (lit). |
 |
|
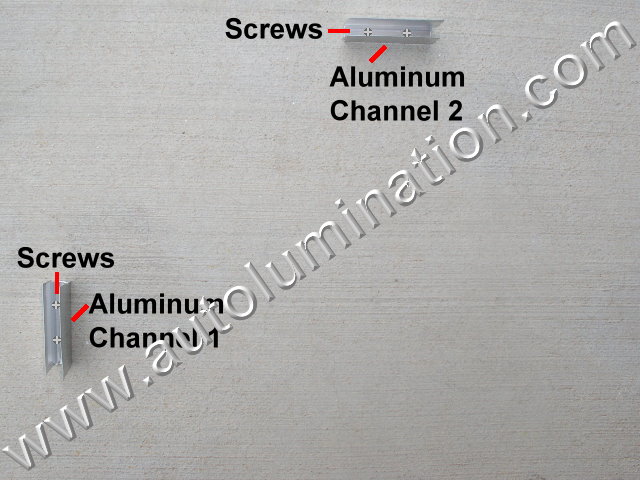
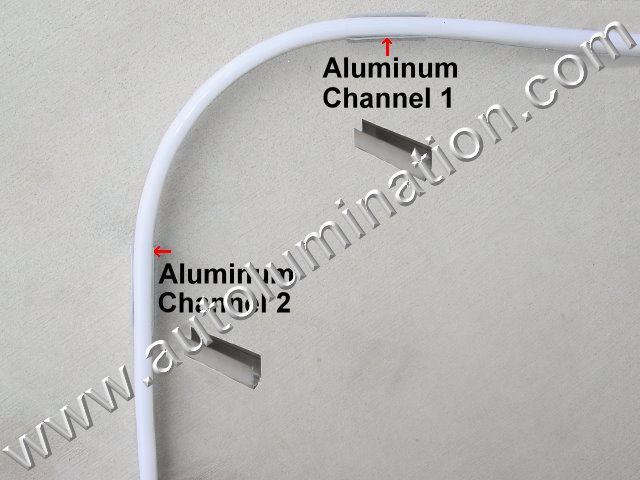
7. Creating Bends |
|
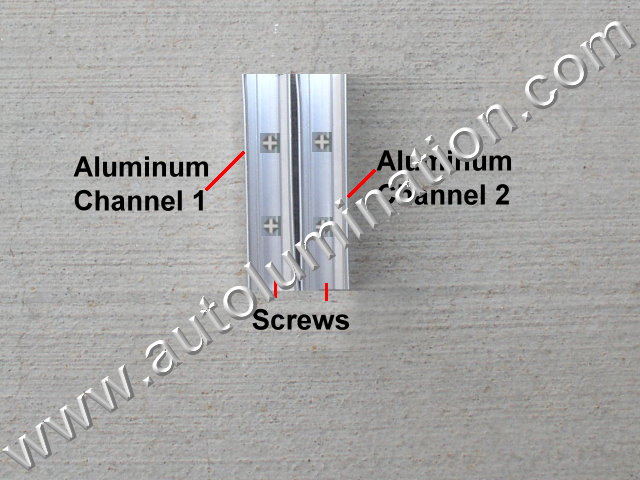
To create a right angle, mount
two Aluminum Channels to your mounting surface using two screws as shown.
|
 |
|
Insert the Neon Tube into the
Aluminum Channels. |
 |
|
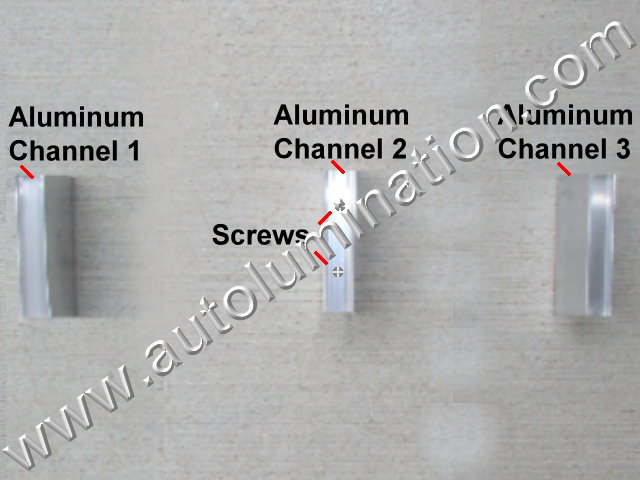
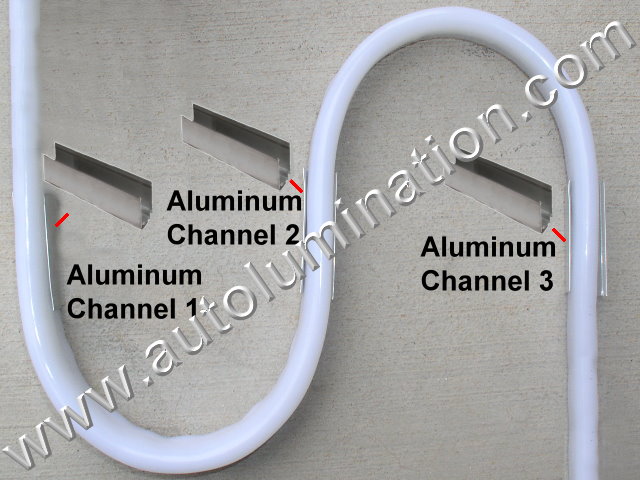
To create an S Curve, mount three Aluminum Channels to your mounting
surface using two screws as shown.
|
 |
|
Insert the Neon Tube into the Aluminum Channels.
|
 |
|
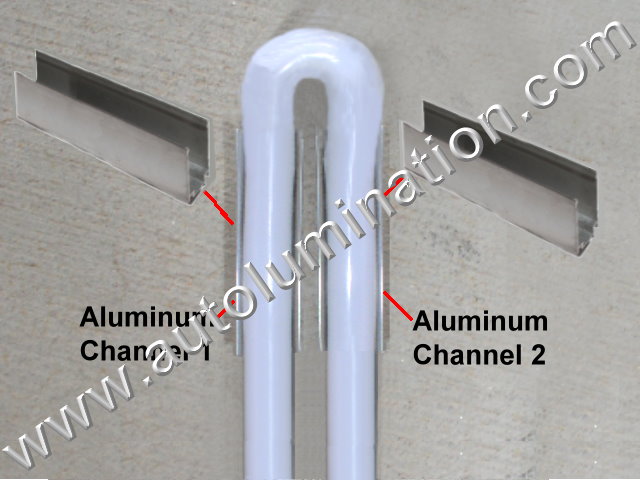
To create a 180 degree Curve, mount two Aluminum Channels to your mounting surface using two screws as shown.
|
 |
|
Insert the Neon Tube into the Aluminum Channels.
|
 |